Saturday, December 22, 2012

Christmas Cutie for ScrapbookPal.com

Hi everyone!! I hope you are having a festive holiday season! I am back today with another Christmas themed layout for ScrapbookPal.com! You might be aware of a very popular trend in paper crafting right now, and that is chevrons. I love this look, and have seen so many fun ways to reproduce it on projects. This is my version of a chevron look using the Teresa Collins Sophisticated cartridge! If you use the 'border' function on the cartridge there are both a zig zag and what looks like a rik rak shape border cuts. I chose the zig zag and then used my gypsy to weld two of the shapes together. Here is the end result:
My layout design was inspired by a fun sketch over at Creative Scrappers (#233) and I used some cute holiday patterned paper from Echo Park. To begin I took a basic white piece of cardstock and sprayed it with some red and green glimmer mist. I tried to depress the spray nozzle a little slower in order to get the bigger splatters as opposed to a finer mist look.
I cut the zig zag shape 5 times using different coordinating patterned papers, and then laid them out on my background page. Because the zig zags were on the thinner side, I used my zig glue pen to easily apply adhesive.
I created a little cluster in the lower left corner using coordinating stickers and embellishments.
I also used coordinating stickers to create my title. I like to use sticker letters for my title to finish my layout quickly and easily.
Lastly, I fussy cut some cute phrases from one of the patterned papers using myCutter Bee fine tip scissors, and then layered them in a cluster in the upper left corner over some fun washi tape and stickers. I adhered some of the phrases with foam dots to add some more dimension.

Thank you for stopping by to see my project today, and be sure to check out my complete ScrapbookPal.com supply list:

Thursday, December 20, 2012

A Very Merry Christmas for Sketches in Thyme #97

Hello my friends! Today I have a project to share with you for Sketches in Thyme! This weeks fun sketch is another double pager, but I condensed it into a single page. Here is the awesome sketch I got to play with:

And here is my (single page) layout:
Playing again with the SUPER fun Winter Wonderland Collection from My Mind's Eye. I have already gotten 3 layouts out of this pack, and I lOVE it.

The circles had been cut out for a previous project, but I really liked the look so I decided to recycle it! I topped them with some chipboard stickers that coordinated with the papers.

I used another chipboard sticker for my title, and added a cute journaling block behind it. I love time saving elements, like when you can find your title in a coordinating chipboard or sticker set.
I added a whole bunch of fun brads and chipboard in the upper left to embellish further.

Thank you for stopping by and looking at my project today- I hope you enjoy it! Be sure to stop by Sketches in Thyme and play along!!

Monday, December 17, 2012

98% Nice 2% Naughty...

Hi! In case you missed my guest spot over on Every Day is an Occasion a couple weeks ago- here is a rerun :)

Hello my friends! I am thrilled to be here doing a guest post for my good friend, Jill! My crafty project of choice is doing scrapbook layouts so I have a Christmas layout to share with you today! Here it is:


So I realize that the font in the title can be a little bit deceiving, but for clarification it says: '98% Nice, 2% Naughty' ;) which perfectly describes not only the photo, but my nephew in general! I thought the photo had just a little bit of a vintage element with the old fashioned Santa and the colors, so I found some great vintage-looking Graphic 45 product to complement it. Here are some close ups and additional details:
I cut out this adorable garland from Joys of the Season and added some matching jeweled brads to enhance it a bit.
Here is a better look at the title- I mixed the fonts, and also shadowed all the letters with kraft paper to make them stand out a little from the busy background paper. The stamps and postcards were fussy cut from some of the Graphic 45 papers. I love the vintage look of it!
Here is a closer look at those gorgeous vintage postcards and stamps. On one of them I did try to create that typical stamp border with a hole punch- but it was WAY too time consuming, lol so only one of them has that border on it, but I felt they looked good either way.
I hope you have enjoyed my project- thank you so much for taking the time to look at it! Please stop by Everyday is an Occasion and leave Jill some love!

Thursday, December 13, 2012

Merry Christmas Layout for Scrapbook USA Expo

Hello! thanks for stopping by today!! Today I have a quick and easy project on behalf of My Mind's Eye and Scrapbook USA Expo. So we're in the thick of the holiday season, which is a very busy time for most of us. Often times we end up setting aside our scrapbooking time for more important tasks such as holiday shopping, baking and visiting with friends and family. But we still have those fun holiday photos that we want to get into books, right? Today I am going to show you how you can create a cute holiday layout in 30 minutes or less by using coordinating papers and embellishments. I got the privelege of playing with the most ADORABLE Winter Wonderland Collection from 
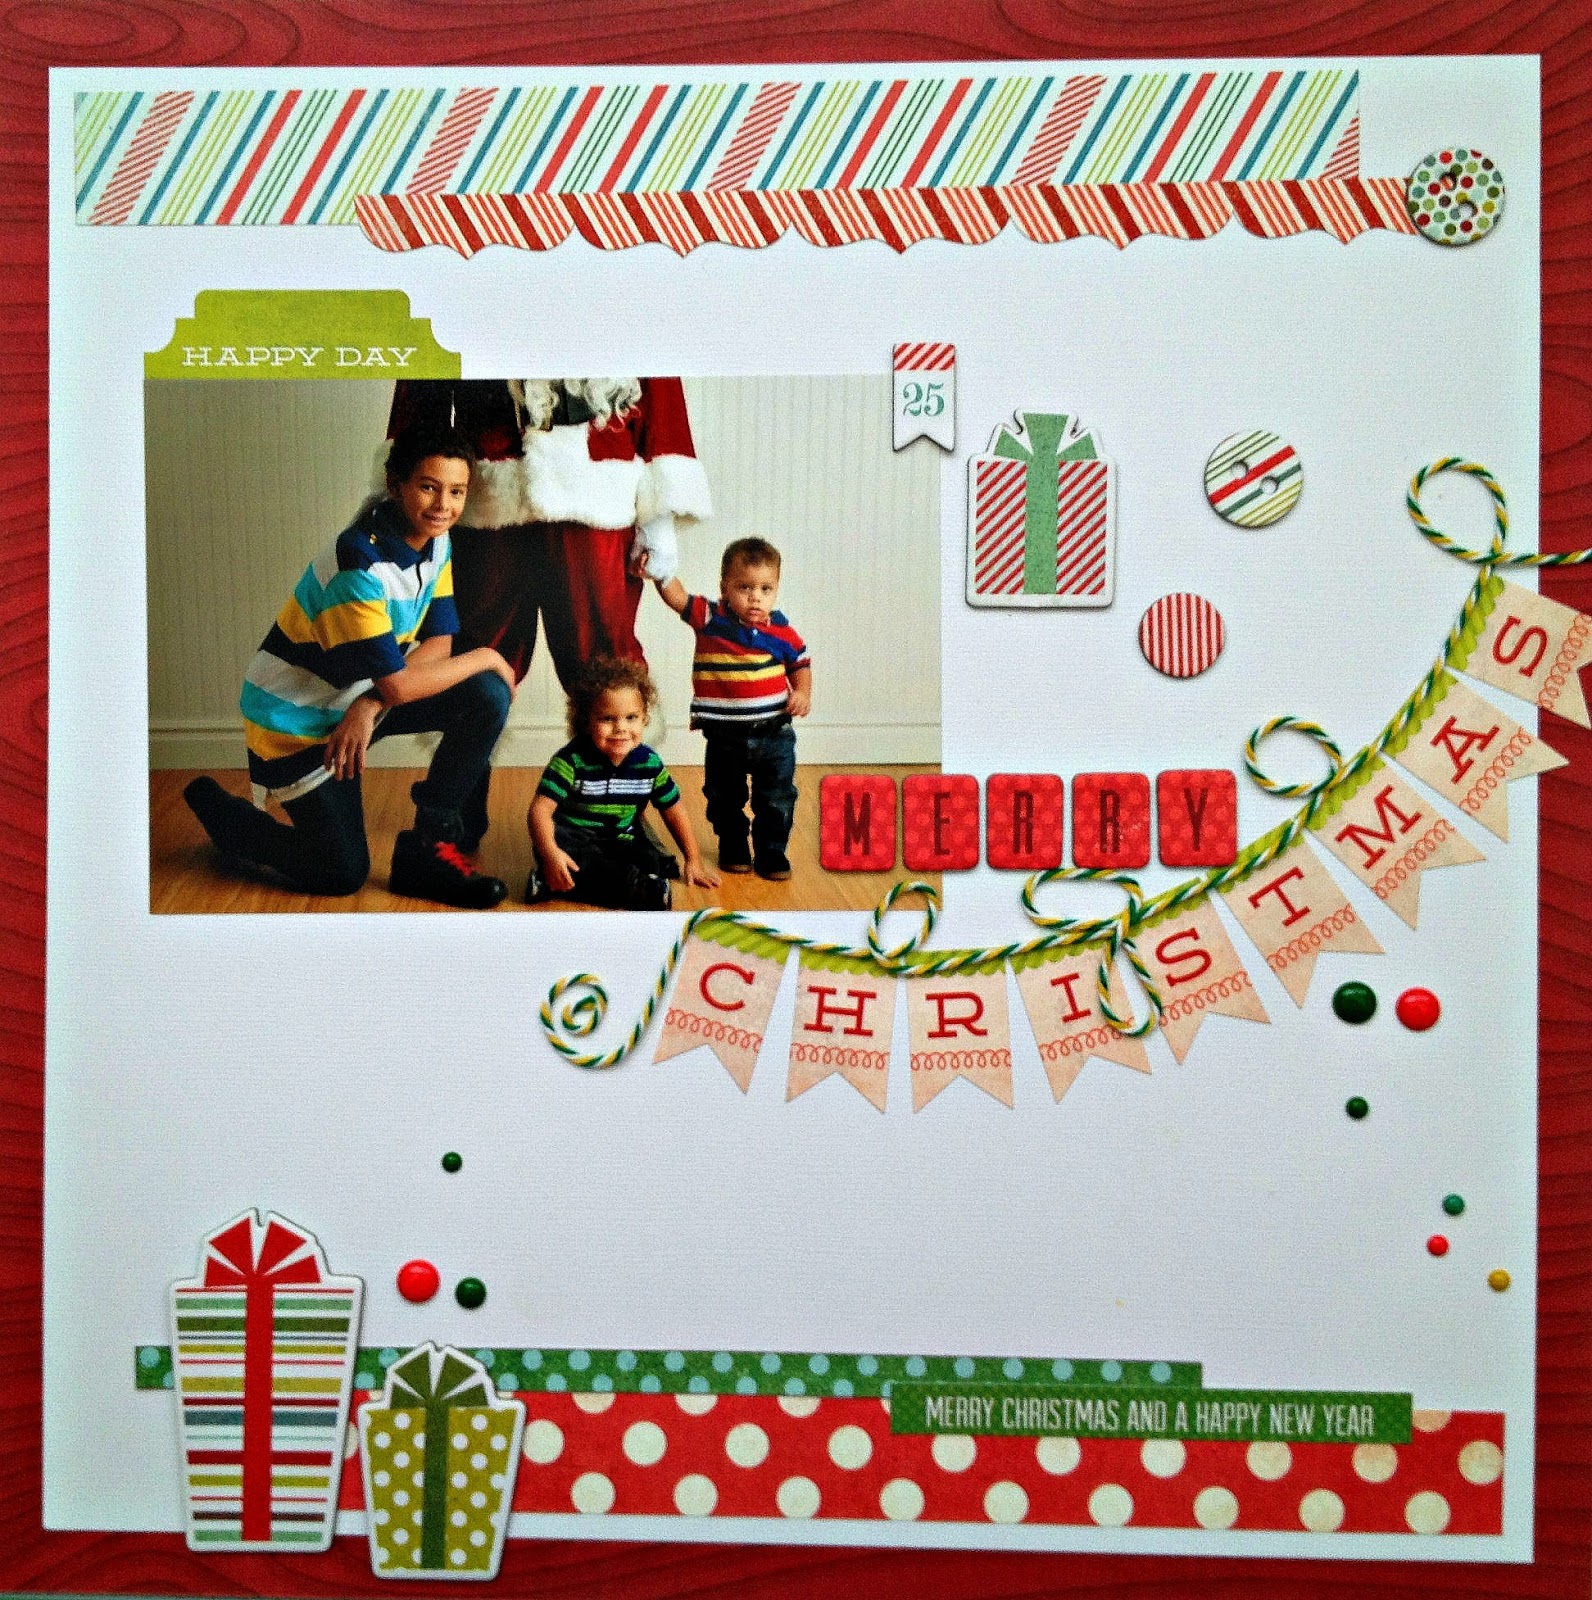
My Mind's Eye. This collection is great because it will work well for your holiday layouts, or just your winter themed pages equally. Here is my layout:
When I am trying to get a layout done in a hurry I usually start with a sketch I like. It takes a lot of the guess work out of it and allows you to just get to creating. Here I used a sketch from Creative Scrappers (#204) as a starting off point. I also created a title using the matching embellishments that coordinate with the line. Here I created a banner with some stickers and (the cutest!) baker's twine, and added some additional chipboard stickers to spell the "Merry Christmas".
I then added some additional fun chipboard elements around the page. I love that these have an adhesive backing, so it makes them very user-friendly (and fast!). Also- the cute candy caned striped border piece is also a sticker- more time saved!
The green polka dot strip was from the edge of the paper where they have the bar code, collection title and a preview of what is on the other side of the paper. I like to cut these out and use them- then I can use an element of the pattern without cutting into my 12x12 piece! These little present embellies are also chipboard- so much fun!
 OMG- I think I am just IN LOVE with these enamel dots! They are such a fun way to add a little pop of color or a confetti look and they are adhesive-backed so no hole punching!!

I hope you have enjoyed my project today and are inspired to take 30 minutes to get some fun holiday layouts completed while in the midst of this busy season. Thanks for stopping by today!

Sunday, December 9, 2012

We Wish you a Merry Christmas for Scrapbook USA Expo

Hello friends! It's Heather and I have another fun holiday layout to share with you today using the ADORABLE Winter Wonderland collection from My Mind's Eye. I love the bright colors in this collection, it was really fun to work with. Here is my layout:
 
 My cute nephews got their picture taken with 'Santa' (it was their dad dressed as Santa, how cute is that??) and the bright colors in the photo matched perfectly with the bright colors in the papers. I used a cute sketch from Jenny Evans as inspiration, and then just ran with it. I started with some spray ink on white cardstock. I figured out that if you depress the nozzle slowly you get the bigger paint splatters, vs the fine mist you get when you depress it quickly. I like the bigger splatters so it took a lot of trial and error to figure that out!
 
Next I cut out a bunch of solid circles and circle frames on my die cutting machine out of several different coordinating papers and layered them beneath my photo. I topped them with some cute buttons and chipboard shapes for a fun, whimsical look.
 
 
I used a sticker as my title (love what a time saver that is!!) and added some additional stickers and my project was complete! I hope you enjoyed my project, thanks so much for stopping by today!!

Saturday, December 8, 2012

Disney Dreams for Sketches in Thyme

Hello my bloggy friends! Please forgive me for posting this so late- should have been done on December 6th, but this has been a CA-razy week to say the least. Got a new job, AND an amazing new opportunity to work with DCWV as a designer. More on that later! But I did want to share the layout I created with the current sketch over at Sketches in Thyme! I actually really love this layout, and it's been done for a couple weeks now, but we've had a lot of grey days so I didn't have light to photograph it and it got pushed aside with everything else I've had going on. Well... better late than never right!!
Without further adieu, here is the current sketch- #95 - that I had to work with:
And here is my layout:

I wasn't actually on this trip to Disneyland with my adorable nieces, but the photos turned out so cute I just had to scrap a few of them. They are both such princesses, and meeting some 'real live' princesses was a dream come true for both of them.
I love buying paper collections in packs or kits- especially when they have coordinating stickers. Makes my layout very quick and easy.
The title was also done with coordinating letter stickers. These are my new go-to product. Saves so much time from cutting out and adhering each letter individually.
A few more fun stickers as embellishement...
And one last fun sticker!! I hope you enjoyed my project, and I apologize again for the lateness! Make sure you stop by Sketches in Thyme and join in on the fun!!

Friday, December 7, 2012

Christmas Cousins for ScrapbookPal.com

Hello and thanks for stopping by today! I have a Christmas Layout to share with you today using the popular Teresa Collins December 25th cartridge, available at ScrapbookPal.com. Be sure to head over and grab a copy before the season is over- only $22.99!! Here is my layout:
I used some fun winter/holiday papers from Basic Grey and a sketch by Creative Scrappers (# 218). 
I love how well this sleigh cut fit into my layout. It is a really fun and versatile cut that could be used for all sorts of projects. I layered a few different strips of washi tape underneath the cut, and then added some coordinating little stickers on top. Because of the delicate filigree design on the bottom of the sleigh, I like to use my Zig glue pen- it makes it easy to place a coat of adhesive on those delicate cuts without damaging it.
For my title I used a phrase cut from the cartridge that said 'Merry Christmas' but used just the 'Christmas' portion, then I added some letter stickers for the second word. I like to mix up fonts, colors and styles on my titles- it makes it more visually interesting. Also, when I have a vey intricate cut like the "Christmas" I like to run it through my Xyron Sticker maker. Makes getting an even coat of adhesive very quick and easy.
To finish off I added some more coordinating stickers. Overall a very quick and easy layout!

Thank you for stopping by today- make sure to see my complete ScrapbookPal supply list: