Showing posts with label Ribbons and Rosettes. Show all posts

Wednesday, November 7, 2012

Thanksgiving Table for ScrapbookPal.com

If you are looking for the Scrapbook USA Expo Blog Hop please go HERE


I am SO super excited to be back with a creation on behalf of ScrapbookPal.com! I want to take a moment to thank the folks over at ScrapbookPal for not only being understanding when I needed to take some time due to personal issues, but for allowing me to come back and create with them again! If you have never visited ScrapbookPal.com it would really be worth your time to go give them a little visit. They have all the supplies you need for any kind of paper crafting project and then some, and their prices are the most reasonable I've found on the web.
Here is a layout I created using ScrapbookPal products:
These are some photos of my mother in law's elegant Thanksgiving Table, so I wanted to create an elegant layout to showcase them. Elegant is not always my style, so it was a little challenging but I think I am pretty happy with the result. I started with a Page Maps sketch for inspiration and added some pretty Autumn-inspired papers from SEI. I liked that they had a shimmery texture, or foil embossed designs that matched the elegance of the page. Here are some details:
One of the cool things that ScrapbookPal carries is these mist-able flowers from Petaloo. They are white in the package, and you can ink or color them however you want. I colored mine with some spray ink by October Afternoon and then added some glimmer mist to add a little sparkle. Hopefully you can see the shimmer in the picture. I loved that I could manipulate the flowers to match my layout in any way I chose, and they absorbed the ink very well.
Here are some more flowers and a rosette I created with the Ribbons and Rosettes cart. I added a fleur de lis shape and some really cool metal flowers from Basic Grey.
I tend to always go to my Cricut collection when cutting titles, but I have recently realized how nice it is to add some letter stickers in there to mix it up a bit, and it is also much more time saving. Because 'Thanksgiving' is such a long word it was easier to use small letter stickers and not take up the whole page.

I hope you enjoyed my project! Thanks so much for stopping by, and be sure to stop by ScrapbookPal.com to pick up some supplies for your own projects!!

Here are the ScrapbookPal supplies that I used:


Wednesday, May 30, 2012

Cooking with Cricut Challenge #88: May Flowers

Hello crafty friends and welcome to another fun challenge over at Cooking with Cricut! This week we are celebrating those May flowers!! I decided to take a slightly non-traditional take to the spring flowers, but there are still flowers in several different places on my layout. Here it is:
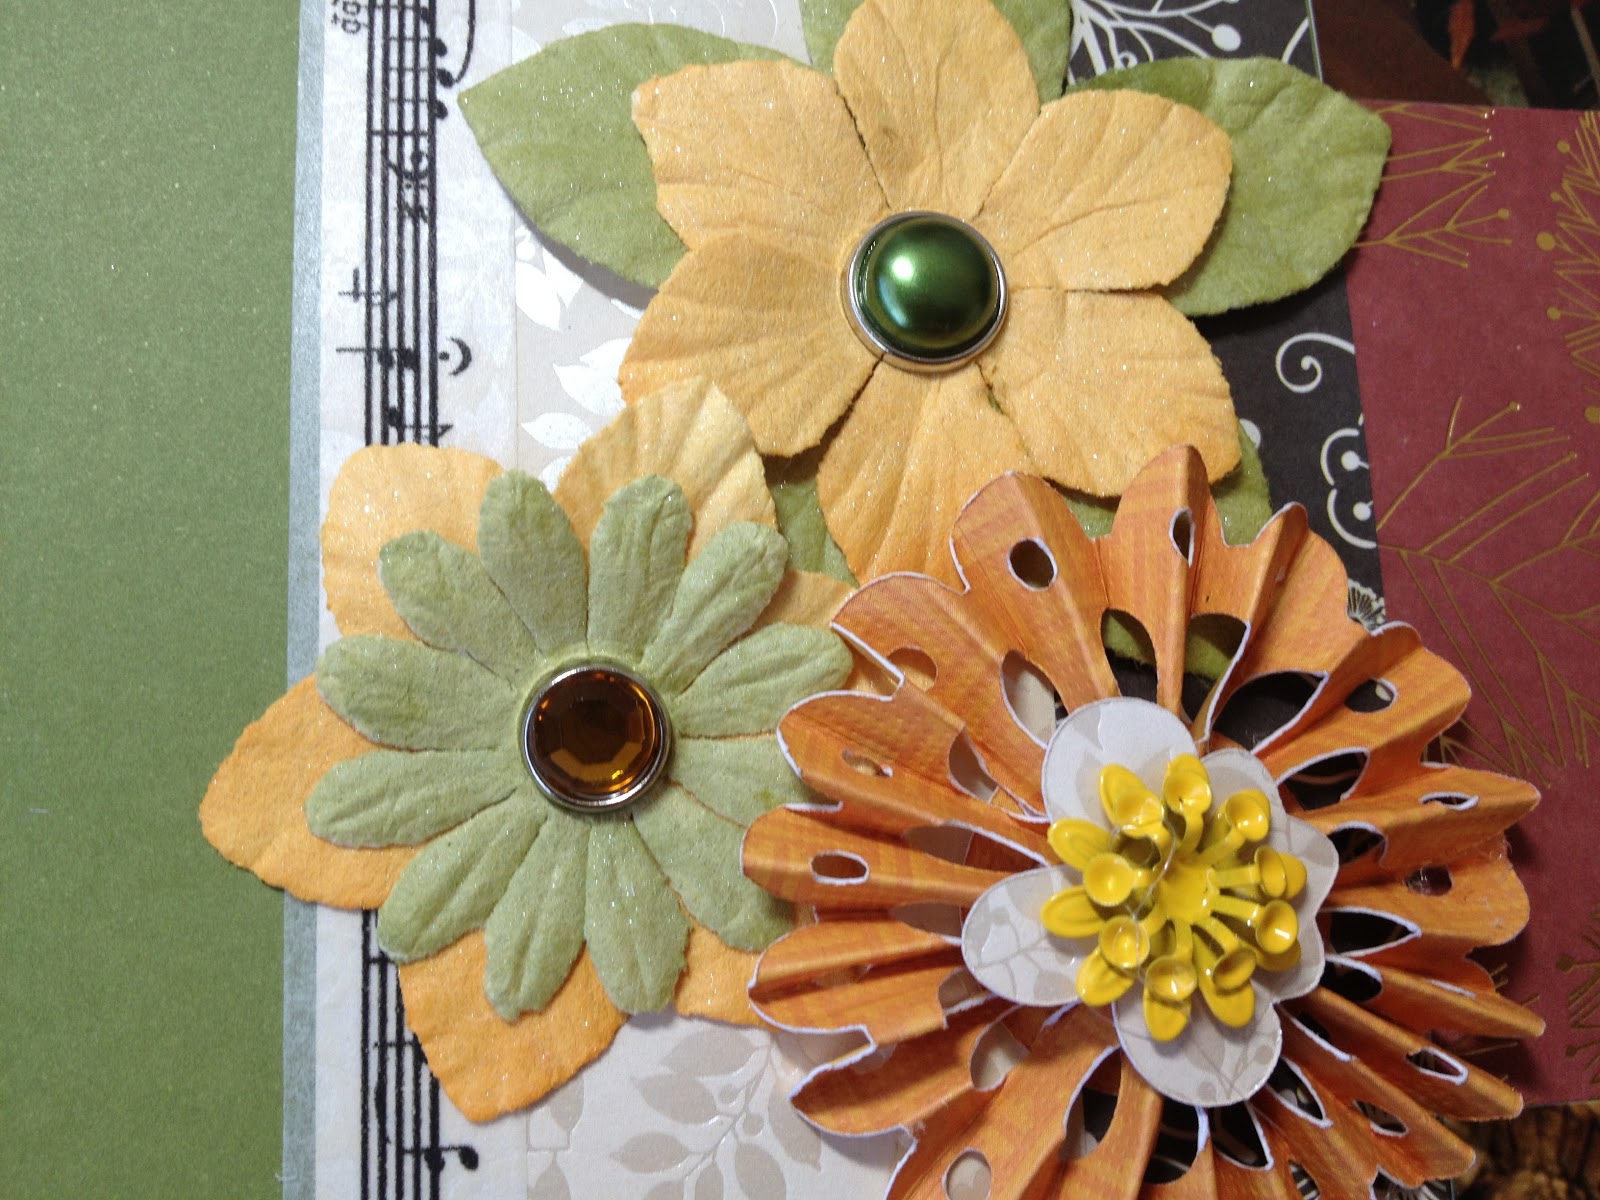
I don't have as hard of a time as some people doing layouts of myself (assuming I have a decent pic, lol!), but this one was a bit of a struggle as I just wasn't sure what I was conveying about myself. I finally settled on the straightforward -This is me- right now, today. Simple, right?? The wood grain border was cut from Ribbons and Rosettes and also has a flower pattern on it. You can see it better below:
I printed my background paper and the newsprint on the Imagine Vintage Papers cart. I only recently acquired this cart and wondered why I didn't purchase it much much sooner, lol! Sometimes you discover a cart is just one of those hidden gems. I misted and dripped some blue/green ink on the background paper for a little pop of color. Also, I used my Gypsy for this cart. I purchased my Gypsy several months ago, and lets just say there has been a bit of a learning curve. Everyone raves about it, but it has taken me a while to figure out the ins and outs. I think I am finally getting the hang of it a little bit! So long story short- I used Gypsy Font for the 'me' and (FINALLY!) mastered the weld, lol!
I added some May flowers by way of a fun little banner. I printed out the newsprint pattern from the Vintage Papers cart, then cut out some flower shapes from the Mother's Day Bouquet cart. Then I inked the edges a bit, punches a hole and threaded them on some baker's twine. I threw in a few little flag stickers for fun.
Lastly I made a couple flags with some more stickers and done! Thanks so much for stopping by today, and please be sure to check out the Cooking with Cricut blog to see what the rest of the DT cooked up for you and join in the fun!!

Supply List:
Cardstock: ColorBok
Patterned Paper: Echo Park (This & That-Graceful), Imagine Vintage Papers
Cartridges: Mother's Day Bouquet, Ribbons and Rosettes, Gypsy Font, Imagine Vintage Papers
Stickers: Echo Park (This & That-Graceful)
Buttons: Dear Lizzy for American Crafts (Neapolitan), Pink Paislee (spool)
Brads: Basic Grey, SEI
Ink: Tim Holtz Distress Ink, Sprinklers

Saturday, May 26, 2012

Practical Scrappers Frugal Finds

Hello crafty friends! I am not sure if you are aware, but Practical Scrappers has a cool installment on their blog every month called Frugal Finds. It shows you how to take everyday objects and transform them into cool embellishments for your projects! This installment we are using produce mesh- like the kind your onions or oranges come in! I decided to use the mesh and some paint as a way to add texture to my background paper! I used the new Echo Park Note to Self line- once I laid my eyes on that view finder paper I did not waste a second getting my paws on it! lol! Here is my layout:
I was so LUCKY to get these HILARIOUS photos of my nephew Sevyn crawling through the doggy door! How can you not smile at that face peeking through the flap?? haha! As far as the mesh, I cut out a square, smeared some acrylic paint on (yes, this was a little bit of a messy project!) and then I layed it down on my background paper in random places. Here are some close-ups:
I used the letter stickers from the Note to Self sticker sheet for my title. It's fitting, right? ;)
I cut some border pieces from the cork patterned paper with my Ribbons and Rosettes cart. I just recently re-discovered this cart for it's border cuts and I have used it like 3 times in one week already, lol!

Thanks for stopping by today! I hope I have inspired you to take a second look at some of those household items that you might usually throw away! Make sure you stop by the Practical Scrappers blog for some additional ideas on how to use those mesh bags in your projects!!

Supply List:

Kraft: Bazzill Basics
Patterned Paper/stickers: Echo Park (Note to Self)
Acrylic Paint: Apple Barrel
Cartridge: Ribbons and Rosettes (borders)


Thursday, May 24, 2012

Cooking with Cricut Blogaversary Celebration Week Day 4

Hello and welcome back to Day 4 of Cooking with Cricut's weeklong blogaversary celebration!! Today we have a fun theme- Tiaras! For all those girlie-girl projects tiaras are such a fun embellishment. I had the perfect idea for a layout with my beautiful niece Emma who is about as girly-girl as you can get, lol!! Here is her layout:

I'm not usually a big bling-y girl, but it was appropriate for this layout so I brought out the bling! Here are some close-ups:
This image is cut from the Hannah Montana cart, and of course I had to bling it up a bit, lol! I think this is just a darling cut! Also added some fun polka dotted washi tape!
The font from Ribbons and Rosettes has holes cut in the letters that are just asking for a little bling to be added! Also, you can't see it really well here, but the 3" strip across the layout has a bunch of little tiaras! Thought it was too perfect not to use! All the paper is from American Crafts Ever After line.
One last bit of bling with the flower centers! Thanks so much for stopping by today, and be sure to come visit the Cooking with Cricut blog to see all the other amazing projects our Design Team has cooked up for you!!

Supply List:

Cardstock: Colorbok
Patterned Paper: American Crafts (Ever After)
Gems: recollections, Close to my Heart
Cartridges: Hannah Montana (princess), Ribbons and Rosettes (in, borders) Gypsy Font (training), Elegant Edges (Scalloped squares)
Flowers: Prima
Washi Tape: Queen & co.

Monday, May 21, 2012

Cooking with Cricut Blogaversary Celebration Week: Day 1

Hello friends and welcome back to our continuing celebration of the 2 year Blogaversary at Cooking with Cricut! We are having a week long celebration with lots of inspiration, giveaways and freebies! Today's theme is All things Girlie! We want to see pink, and add some satin- either flowers, ribbon or fabric!! I decided to do a layout of one of my adorable girlie-girl nieces Evie. Here it is:

I decided not to go real heavy handed with the pink, but there is definitely plenty of pink in there! And the little music note ribbon is my satin. All of the papers are from the Dear Lizzy Neapolitan line. I was a little late to the party on this line, but so glad I discovered it because I am now in LOVE. Wish I had some more, lol!! Here are some details:
The title is cut from Rock Princess, and is so appropriate for this sweet girl! I layered some border strips underneath the title for some added interest.
The clouds are cut with Serenade. I loved the flourishes that are cut into them. I also cut a circular swirl from Paper Lace (don't have a better way to describe that, lol!). I layered that under the photos.
I honestly did not even realize I had this adorable loopy border on my Ribbon's and Rosettes cart, but I am so glad I discovered it as there are tons of cute border images. Who needs border punches now, lol! Here is also a better look at the cute satin ribbon.
This jar is the reason I bought the Dear Lizzy papers, could they be any cuter?! Also, a new fave embellishment: spool buttons! Yay!
Thanks so much for joining in our celebration, and be sure to check back at the Cooking with Cricut blog throughout the week as there is PLENTY of inspiration to go around!!

Supply List:

Cardstock: DCWV
Patterned Paper: Dear Lizzy for American Crafts (Neapolitan)
Cartridges: Serenade (clouds) Rock Princess (title), Ribbons & Rosettes (loop border) Paper Lace (swirl)
Spool Buttons: Pink Paislee
Banner Flags: American Crafts


Tuesday, February 28, 2012

2012 Scrapbook Trend #8: Numbers

Welcome back to another 2012 Scrapbook Trend project. This time our trend is Numbers. When I decided to do these projects and saw the numbers trend I already knew what I wanted to do. I had taken a picture of what I was doing at 11:11 on 11/11/11. I thought it would be fun to make a layout highlighting this random moment in my life on a very unusual date and time. In my case, I had been in a fairly bad car accident the week before and broke my leg. At 11:11 on 11/11/11 I was convalescing at home with my two critters. I really love this photo because those guys really were right by my side throughout the whole healing process. Here is my layout:
I printed out my journaling on patterned paper and cut it in strips. I used the Sophisticated cart for the title. I really love the pretty flourishes and the framed monograms as well.
I purchased this date stamp (part of the Smash collection) and I love love love it! I will be using this one A LOT.
I won this Pink by Design script background stamp in a blog hop, and the one thing I was excited to do with it was stamp on flowers, lol! I added some liquid pearls to the flower centers (another new favorite!!)
Broke out the Ribbons and Rosettes cart again. It is fun to experiment with the different edges and looks you can get with all the different cuts.
I hope you enjoyed my project, and will be inspired to use some numbers on your project! Stay tuned for the next trend (next to last!!) which is Decorative Tape! LOVE this one!

Supply List:
Cardstock: Colorbok
Patterned Paper: Basic Grey (Out of Print)
Cartridges: Elegant Edges (borders, scalloped mat), Sophisticated (title) Ribbons and Rosettes (Rosette)
Brads: Basic Grey
Flowers: Prima
Liquid Pearls: Ranger
Bakers twine: My Craft Spot
Buttons: Button Bonanza
Stamp: Smash

I am entering the following challenges:

Party Time Tuesdays - Anything Goes

Monday, February 20, 2012

2012 Scrapbook Trend #5: Chalkboard

Hi everybody! It's been a while since I posted one of my 2012 Scrapbook Trend projects. I kinda got stuck on this one, which is chalkboard. I was actually really excited to try it out, but then had a really hard time finding a way to fit it into a layout. I think this trend would be perfect for a back to school project, or labeling. Lots of fun uses for the new chalkboard paper. I wanted to show how it could be used in a layout, and that is where I got held up. Either way, I incorporated it into this layout of a photo taken at a surprise party we held for my mom's 60th birthday. She's a teacher, so the chalkboard did fit...kindof, lol! Here is the project:
I used this week's sketch over at SOUS for the layout design. The actual chalkboard paper is from DCWV- they actually have a whole line of chalkboard paper pads, so if you want to give it a shot I would recommend them. They have different size stacks, as well as different colors, and the paper was not too heavy- I easily cut out this blurb shape from Plantin Schoolbook with my Cricut. I tried writing on the chalkboard with an actual piece of chalk, and it worked fine, I just didn't like my handwriting with the chalk. So I rubbed the chalk dust onto the paper (so you could see it was a 'chalkboard') and then wrote the actual text with a white galaxy pen from American Crafts. It still looks like chalk, right?
I cut the rosettes from the Ribbons and Rosettes cartridge. I got this cart for Christmas, but have been sitting on it. I finally pulled it out a few projects ago and have used it 3 times since! I have been loving it! For the middles I cut balloons from Create a Critter. I used my Zig glue pen to adhere some trendy twine for the balloon string, and tied a bow.
I cut one more balloon to add next to the title. I wanted to make it clear that this was a birthday page, even though it might look like just a family photo :)
Make sure and stop by tomorrow for 2012 Scrapbook Trend #6- Doilies!

Supply List:
Cardstock: Colorbok
Patterned Paper: Pebbles
Chalkboard Paper: DCWV
Cartridges used: Simply Sweet (title) Ribbons and Rosettes (Rosettes) Create a Critter (Balloons) Plantin Schoolbook (blurb)
Bakers Twine: My Craft Spot
Brads: Basic Grey

Challenge Entered:
Stuck on you Sketches - Sketch

Thursday, February 16, 2012

Patches of Pink Design Team Member!!

For 4 Crafty Chicks Guest Designer post please click HERE (or see below :)

Hello again! I have another exciting announcement to make- I have been chosen to be a design team member for Patches of Pink! If you are not familiar with this blog then you must check it out- Jalisa is uber talented, as are all the design team members, so really great inspiration as well as fun linky parties and challenges! Our theme for this week is Valentine's, so please come link up your awesome Valentine's projects with us!
For my project I am showing a Valentine's Box I made for work. They decided to have a team building activity where everyone would bring in homemade Valentine's boxes (like we did in Elementary School!) and pass out Valentine's to each other, it was fun to take that trip down memory lane :) This box was surprisingly hard to photograph, so please forgive the photos:
 Almost all the cuts were made with Love Struck 2010, except for the rosettes that were cut with Ribbons and Rosettes. 
 I added some glossy accents to the rose to give it a little glisten.
 I accented a few of the hearts with some diamond stickles and added some bakers twine to a clear button.
 All the paper is from Echo Park Yours Truly.
I hope you enjoyed my 'old school' Valentine's Box. Please head over to Patches of Pink to check out what the rest of our amazingly talented design team has created, and be sure to link up with our linky party!!